This post may contain affiliate links. Please read our disclosure policy.
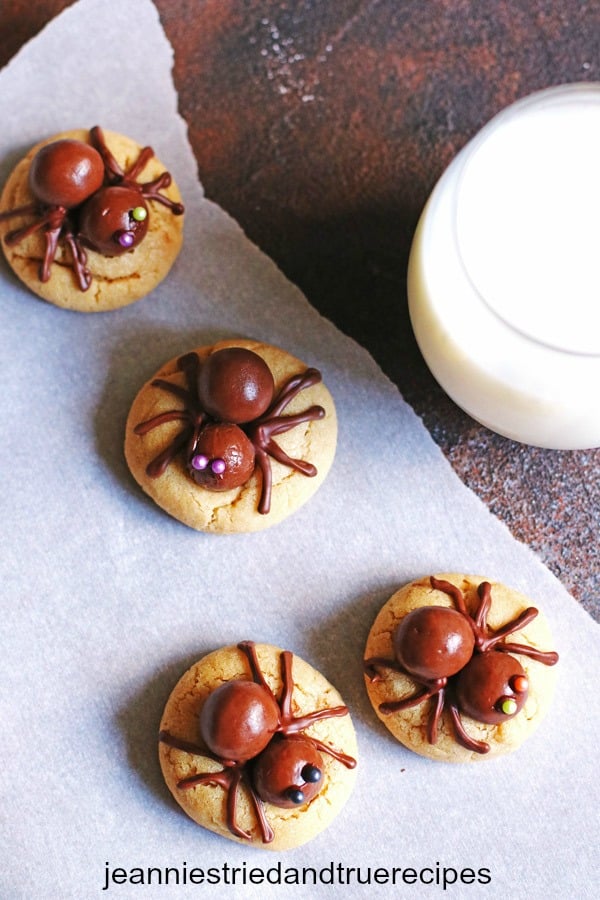
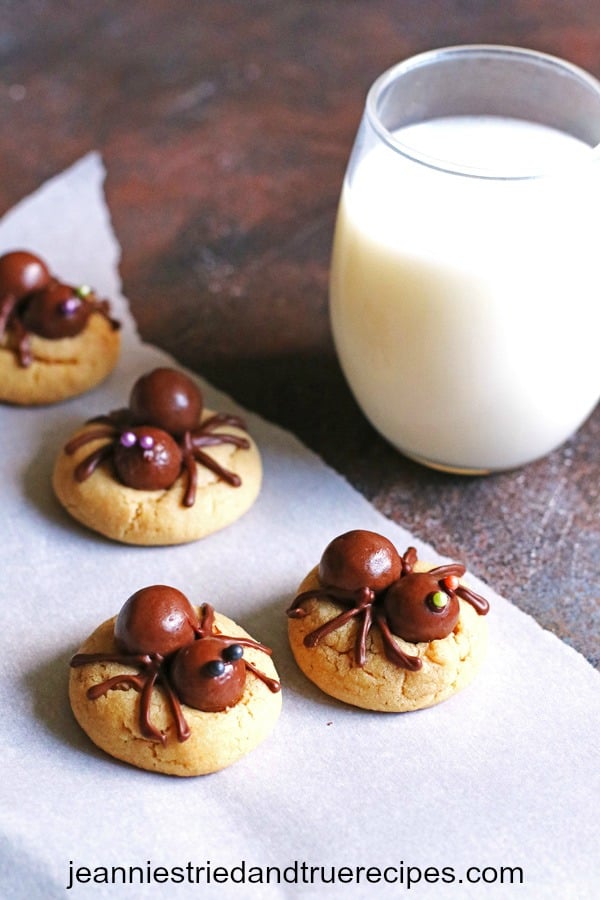
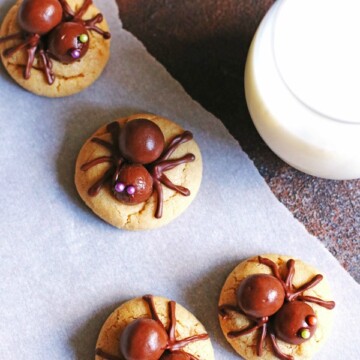
These Spider Cookies are a great treat for Halloween. The delicious peanut butter cookies topped with a candy spider are spooky yet delicious!
With Halloween just around the corner, I want to share this recipe for these Spider Cookies that I love to make for my family. They are easy to make and so darn cute…as cute as spiders can be.
These are the kind of spiders I like…unlike the real ones I used to have my dad take care of for me. Yes, I did that until I got married. I was scared of a spider until I was in my 20’s! But there is nothing scary about the spiders on these delicious peanut butter cookies.
The peanut butter cookie recipe that I use for these cookies originates from a great recipe found on Sally’s Baking Addiction. With this cookie recipe, it is important to chill the dough.
Why chill the dough?
You will need to chill the dough for these cookies. If you don’t chill it, the dough will spread… which is not good because your cookies will turn out flatter than how these look. I would suggest chilling the dough for at least three hours. You can chill the dough for up to two days.
Yes, you need to wait a little longer for the finished product by chilling the dough, but once made, they will be a fantastic soft, thick peanut butter cookie. They are worth the wait, trust me!
Not only will chilling the dough keep your cookies from spreading, it also gives your cookies more flavor. While the dough chills, all the flavors mingle in the bowl.
Ingredient List:
- unsalted butter
- granulated sugar
- brown sugar
- eggs (2)
- vanilla extract
- creamy peanut butter
- all-purpose flour
- baking soda
- baking powder
- salt
- Whopper candy (12 ounce package)
- chocolate chips
- sprinkles for the eyes
For the spider eyes, use sprinkles. If you can’t find sprinkles that will work, you can just add a dot of melted chocolate chips to make the eyes.
How to make Spider cookies:
How to make the Cookie Dough:
Using a mixer, cream the softened butter and both sugars together on medium speed until smooth. Add in the eggs, beating after each one is added. Scrape down the sides of the bowl with a spatula.
Add in the vanilla extract and peanut butter. Mix until ingredients are combined.
In a separate bowl, combine the flour, baking soda, baking powder, and salt together. Slowly add the dry ingredients to the sugar mixture on low speed until well combined.
Recipe tip: Make sure you add a small amount of the dry ingredients at a time and use slow speed on your mixer. By doing this it will ensure that the dry ingredients go into your bowl and not spread all over your counter.
Cover the dough tightly and place it in your refrigerator to chill for at least three hours. The dough can be chilled for up to two days.
How to Bake the Cookies:
Once the cookie dough has chilled, preheat your oven to 350°F. Take out your cookie dough while your oven is preheating to soften it up a little.
Line your baking sheets with parchment paper or silicone baking mats. By lining your baking sheets, your cookies will brown less and also makes clean up easier.
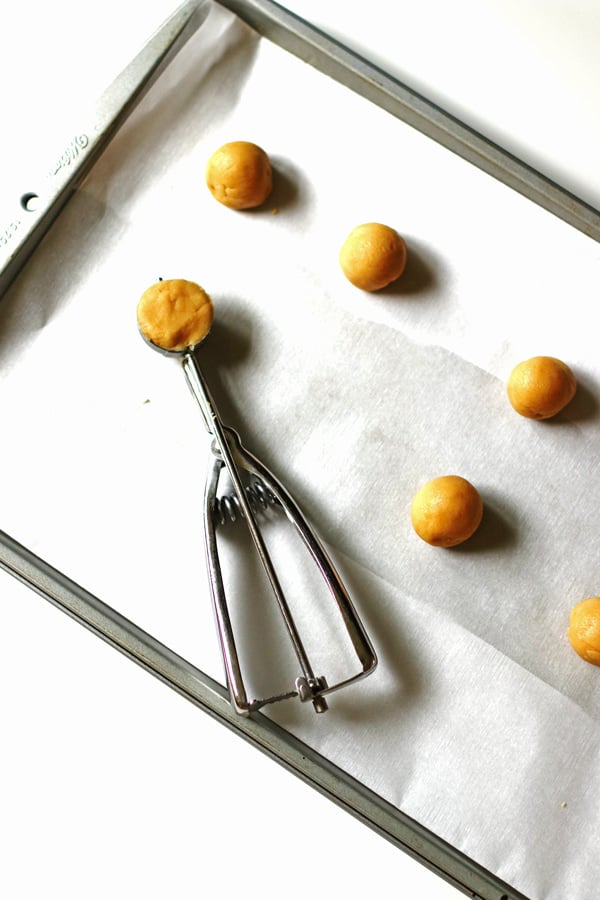
Roll out the dough into balls. I use my cookie scoop that scoops about one tablespoon of dough to make these cookies. If you are not using a cookie scoop, then make dough balls that are about one tablespoon of dough for each cookie.
Recipe Tip: I scoop out the dough with my cookie scoop and then roll the dough balls between my hands to make them more rounded. I like to have the dough balls rounded so that the cookies will turn out with a nice shape.
Place the cookie dough balls on a baking sheet covered with parchment paper or silicone baking mats, about 2 inches apart from each other.
Place your cookie sheet on the middle rack of your oven. Bake them for 11-12 minutes or until the edges are lightly browned.
How to decorate the cookies:
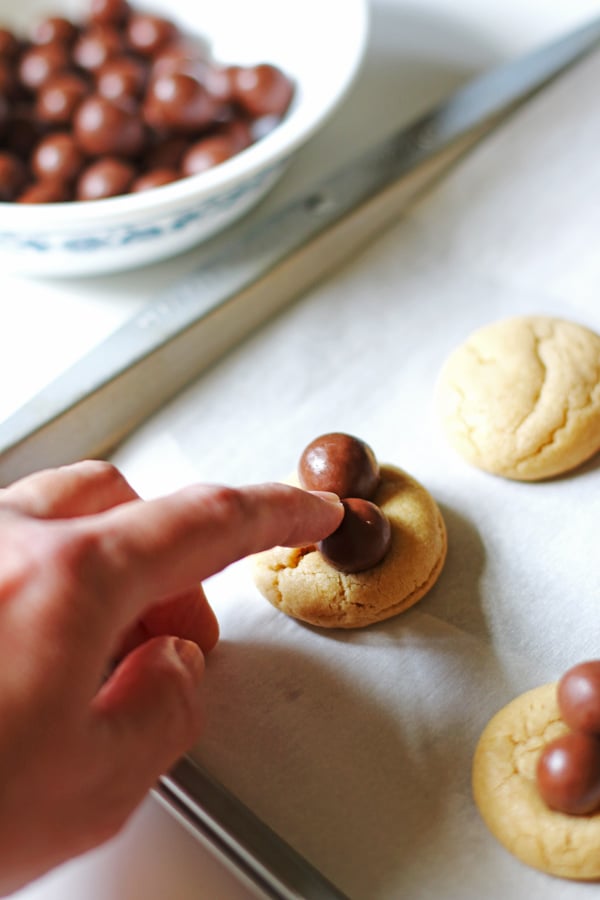
Remove the cookies from the oven and gently press down two Whopper candies on top of each cookie, right next to each other. Press the smaller one slightly further down than the other one to resemble the spider’s head. Let them sit on the baking sheet for five minutes.
Then place the cookies onto a cooling rack to cool completely before adding the spider legs and eyes.

Once you have all the cookies made and cooled completely, add the spider eyes and legs.
How to make the legs:
To make the legs, melt some chocolate chips in the microwave. I use about 3/4 cup chocolate chips.
Place the chocolate chips in a microwave safe dish and heat them for 30 seconds and stir. Then heat for additional 15 seconds increments until it the chocolate chips are melted, stirring after each 15 seconds. The chocolate should be a smooth consistency.
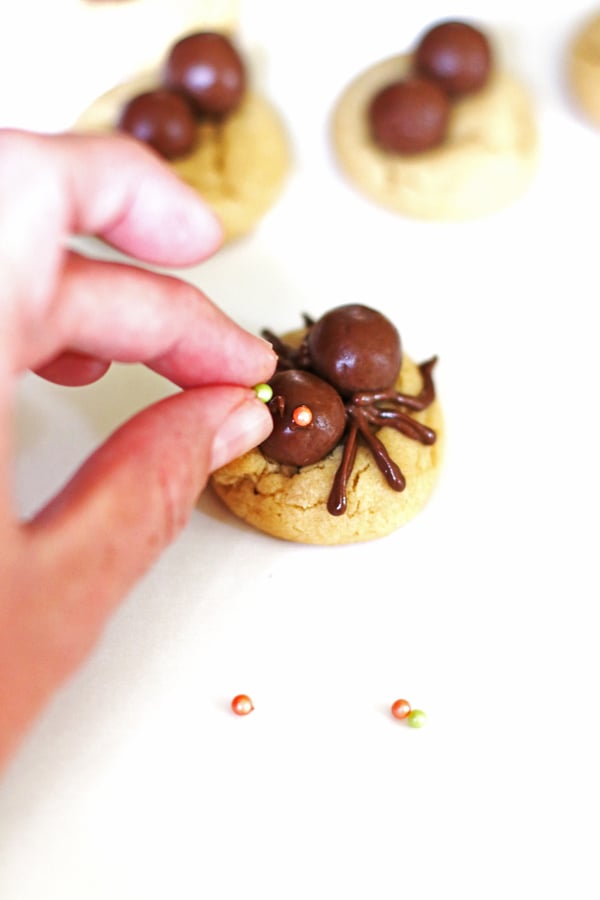
Place the chocolate into a frosting decorating bag with a writing tip attached. Work from the center out, making four legs on each side of the Whoppers. Make two going more towards the front and two towards the back.
Recipe Tip: If you don’t have a frosting decorating bag, you can use a sandwich bag. Cut a small tip off the corner of the bag, add the melted chocolate and seal the bag. Make sure to just cut a small tip off the corner so only a small amount comes out.

How to make the eyes:
To make the eyes on each spider, place two small dots of the melted chocolate on the head of the spider. The chocolate will be the glue to hold the sprinkle in place for the eye. Then add a colored sprinkle for each eye.
If you don’t have sprinkles, you can just use the melted chocolate for the eyes.
Recipe tip: Use tweezers to place the sprinkles on instead of just your hands. The sprinkles are pretty tiny so that might be a good tool to use to get the job done easier.
Decorating the cookies does take some time. I was able to do the legs and eyes in about an hour.
Recipe Tips:
As mentioned above, chill the dough for thicker, more flavorful cookies.
Once the dough has chilled, take it out and place it on your counter for about ten minutes before you start making the cookies so the dough can soften up a little. (I usually do this step while my oven is preheating.)
When using my cookie scoop, I also roll the dough balls between my hands to make them more rounded. I like to have the dough balls rounded so that the cookies will turn out with a nice shape.
It is a good idea to separate the smaller Whopper candy from the larger ones before you start. This way you can use the smaller ones for the spider heads. (This is a great job for kids to do!)
Have the Whopper candy out and ready to go before the cookies are baked so that you can place them onto the cookies while they are warm. The Whoppers will stick to the cookies better if added when warm.
Decorating Tips:
If you don’t have a decorating bag and writing tip for the frosting, cut the very edge off of a corner of a sandwich bag. Place the melted chocolate chips into the bag and seal the bag. Then squeeze the bag to get the melted chocolate out of opening.
Make sure you cut just a small tip off the corner so that not too much chocolate comes out at once. Really. Almost as if you don’t cut anything off…that small. If the corner is cut too large, more chocolate will come out than needed. I learned this one from experience!
Tips for placing the eyes:
You can use a toothpick to add the chocolate on for the eyes. To do this dip the tip of a toothpick in the melted chocolate and then use that end of the toothpick to pick up the sprinkle for the eyes. Gently place the eyes on the spider heads.
You could also use tweezers to place the sprinkles on for the eyes.
Decorating the cookies usually takes me about an hour. Your kids might have fun decorating the cookies! A little help will get them decorated even quicker.
Hungry for more Halloween recipes?
Try these recipes for Witch Hat Calzones, Halloween Dirt Cake, and Candy Corn Snack Mix recipes. Kids and adults love them!
Did you make these cookies? Let me know what you think by leaving a comment and rating below in the comment section. Thanks. I love to hear from you!
Follow me on Pinterest and Instagram for all of my recipes!
Spider Cookies
Ingredients
- 1 cup unsalted butter softened to room temperature
- 1 cup granulated sugar
- ¾ cup light brown sugar
- 2 large eggs room temperature
- 2 teaspoons vanilla extract
- 1 cup creamy peanut butter
- 3 cups + 2 tablespoons all-purpose flour
- 1 teaspoon baking soda
- 1 teaspoon baking powder
- ½ teaspoon salt
For the Spiders
- 1 box Whopper candies (12 ounce carton)
- ¾ cup chocolate chips, melted
- Spinkles for the eyes
Instructions
- Using a mixer, cream the softened butter and both sugars together on medium speed until smooth. Add in the eggs, beating well after each one is added. Scrape down the sides of the bowl. Add the vanilla and peanut butter. Mix until well combined.
- In a separate bowl, combine the flour, baking soda, baking powder and salt together.
- Slowly add the dry ingredients to the wet ingredients and mix on low until well combined.
- Cover dough tightly and chill for at least 3 hours and up to 2 days in the refrigerator.
- Once dough has chilled, preheat oven to 350 degrees. Line your baking sheets with parchment paper or a silicone baking mats (optional). Place the chilled dough on the counter to soften a little while your oven is preheating.
- Roll the dough into balls (about one tablespoon dough each). Place them two inches apart from each other on a baking sheet.
- Bake them for 11-12 minutes or until edges are lightly browned.
- Remove from oven and gently place two Whopper candies on top of each cookie. Press down slightly more on one of the Whoppers to resemble the spider's head.
- Let them sit on the baking sheet for five minutes before placing on a cooling rack.
- Once all the cookies are made and cooled completely, melt the chocolate chips.
- Place about ¾ cup chocolate chips in a microwave safe bowl. Heat for 30 seconds and stir. Heat at additional 15 second increments and stir after each one until the chocolate is melted and smooth.
- Place the melted chocolate into a decorating bag and using a writing tip, make the legs of the spider. Make four legs on each side of the Whoppers. Working from the center out, make two legs going towards the back and two legs going towards the front of the spider.
- For the eyes, place two small dots of melted chocolate on the “spider head” Whopper and place a sprinkle on each dot of melted chocolate.
- Let sit until the chocolate has set.
- Store cookies in an air tight container for up to one week.
Notes
Recipe Tips:
As mentioned above, chill the dough for thicker, more flavorful cookies. Once the dough has chilled, take it out and place it on your counter for about ten minutes before you start making the cookies so the dough can soften up a little. (I usually do this step while my oven is preheating.) When using my cookie scoop, I also roll the dough balls between my hands to make them more rounded. I like to have the dough balls rounded so that the cookies will turn out with a nice shape. It is a good idea to separate the smaller Whopper candy from the larger ones. This way you can use the smaller ones for the spider heads. (This is a great job for kids to do!) Have the Whopper candy out and ready to go before the cookies are baked so that you can place them onto the cookies while they are warm. The Whoppers will stick to the cookies better if added when warm.Decorating Tips:
If you don’t have a decorating bag and writing tip for the frosting, just cut the very edge off of a corner of a sandwich bag. Place the melted chocolate chips into the bag, seal the bag. Squeeze the bag to get the melted chocolate out of the bag. Make sure you cut just a small tip off the corner so that not too much chocolate comes out at once. Really. Almost as if you don’t cut anything off…that small. If the corner is cut too large, more chocolate will come out than needed. I learned this one from experience! Tip for the eyes: You can use a toothpick to add the chocolate on for the eyes. To do this dip the tip of a toothpick in the melted chocolate and then use that end of the toothpick to pick up the sprinkles for the eyes. Gently place the eyes on the spider heads. You can also use tweezers to pick up the sprinkles and add them to the cookies. Decorating the cookies usually takes me about an hour.Nutrition information is approximate and is automatically calculated, so should only be used as a guide.
Update Note: This recipe was originally posted earlier, but was published again in 2020 to include step by step directions and new photos.


Wow those look good ?
Thanks for stopping by Liv!
Jeannie