This post may contain affiliate links. Please read our disclosure policy.
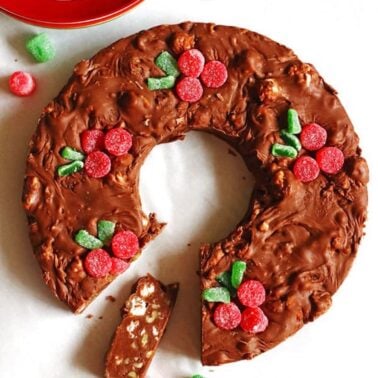
This Easy Christmas Fudge Recipe is shaped into a Christmas wreath and is a delicious holiday treat. Festive chocolate fudge makes a great homemade gift.
This easy fudge recipe is something we always seem to make at Christmas time. It just seems like one of those traditional things to do. Every year we have a few recipes that we make during the holiday season and this delicious fudge recipe is one of them.

This easy recipe makes a great holiday dessert that is quick and easy to make. It also is a nice Christmas gift for someone.
Chocolate Fudge Ingredients
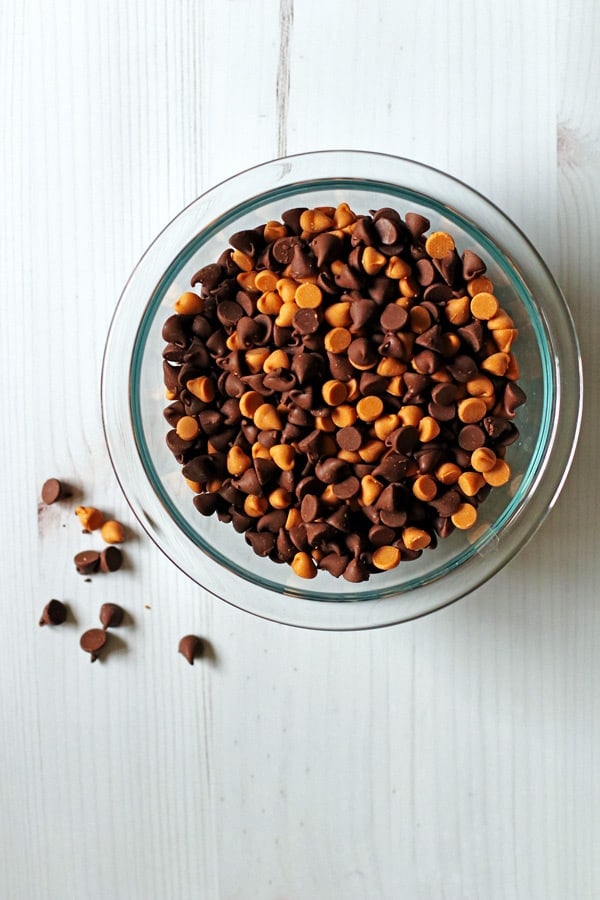
- Chocolate Chips – I like to use Ghirardelli chocolate chips as they have a richer flavor. You can also use milk chocolate chips.
- Butterscotch Chips
- Sweetened Condensed Milk – NOT evaporated milk.
- Vanilla Extract
- Chopped Walnuts
- Mini Marshmallows
- Red, White, and Green Gumdrops
- Parchment Paper or Aluminum Foil
I like to use butterscotch chips with chocolate chips. However, if you cannot find butterscotch chips, peanut butter chips would be a good substitute in this recipe.
How to Make Christmas Fudge
Before you make this Christmas fudge, line your 9 inch cake pan with foil to help the fudge pop out easier when done. Cover the entire inner cake pan with foil.
Recipe Tip: You can also use parchment paper for this step. Just cut some parchment paper into a circle to fit the bottom of your cake pan. (It’s stiffer than foil and will not fold over the sides of the pan as easily as foil so just place it on the bottom of the pan.)
Place the chocolate and butterscotch chips into a medium pot and pour in the sweetened condensed milk.
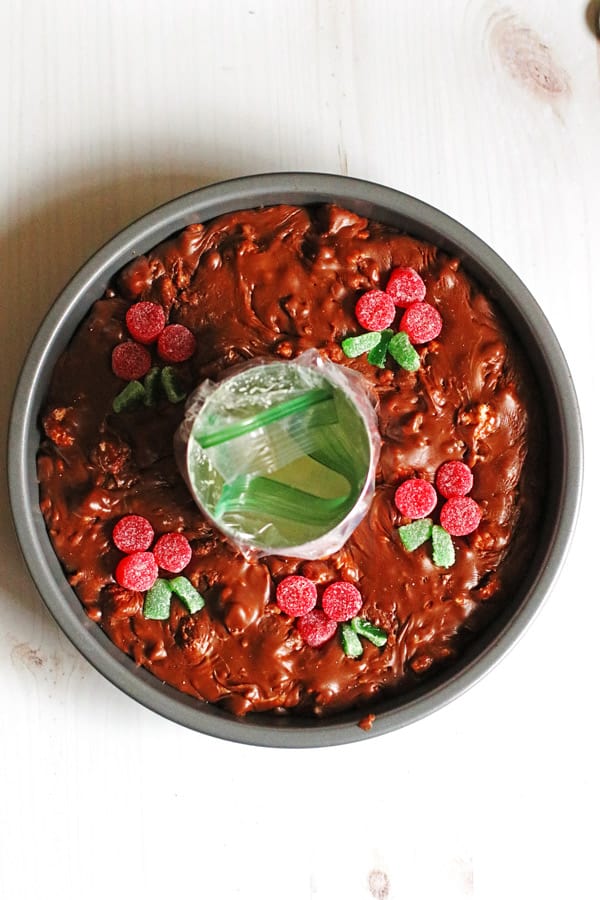
Save the sweetened condensed milk can. This will help make the center of your wreath. Cover the milk can with foil or a plastic sandwich bag and set that aside.
Using low to medium heat, melt the chocolate and butterscotch chips and combine that with the sweetened condensed milk. Stir often until the chips are melted and combined well with the sweetened condensed milk. You can either melt the chocolate directly in a pot or use a double boiler.
Once it looks completely melted and smooth, stir in the vanilla and remove from the heat. Add in the nuts and marshmallows, though both are optional.
Recipe Tip
If you want to have some marshmallow pieces in the fudge, add half of the marshmallows and stir until you can see swirls of melted marshmallows – then add the remaining marshmallows and stir just a bit so there are still visible pieces in the fudge.
How to Assemble the Christmas Wreath
Place the milk can in the center of the covered cake pan. Place it in there with the top facing up, just to make sure that any excess sweetened condensed milk doesn’t spill out into your pan.
Spoon the fudge around the can, making sure the can stays in the center of the pan. If it shifts, just move it back to the center.
Recipe Tip
To make it look more like a wreath, place it in the pan without smoothing off the top. Do more of a coarse look with the fudge to resemble a wreath.
Adding the Gumdrop Berries to the Wreath
The garnish for the berries needs to be added right after putting the fudge mixture in the cake pan since the fudge will start to set very quickly.
We use red, white, and green gumdrops to make the berries. The red can be used as is, but the green should be sliced in half or thirds to make leaves.
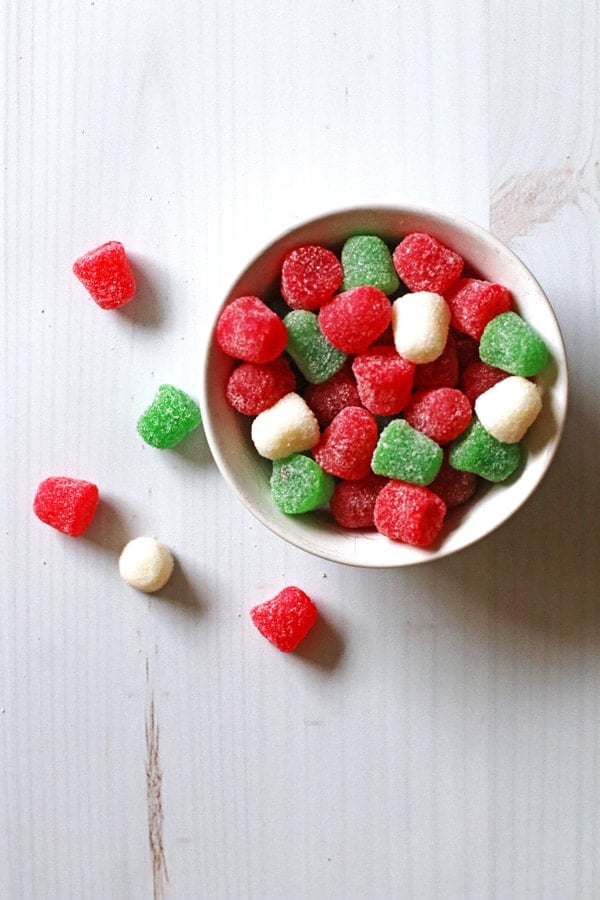
In the past, I have used red, white, and green candied cherries for the holly berries. I switched over to the gumdrop candy because I like the look of them a little more and they are cheaper in price.
You can use whichever you prefer to decorate your wreath to make a festive fudge wreath. Another option is to skip the berries and just add a fabric bow to dress it up.
Place three red gumdrops for the berries into the top of the fudge and then add the sliced green gumdrops for the leaves. Gently press down on them and they will stick to the fudge as it sets in the refrigerator. Add as many as you like.
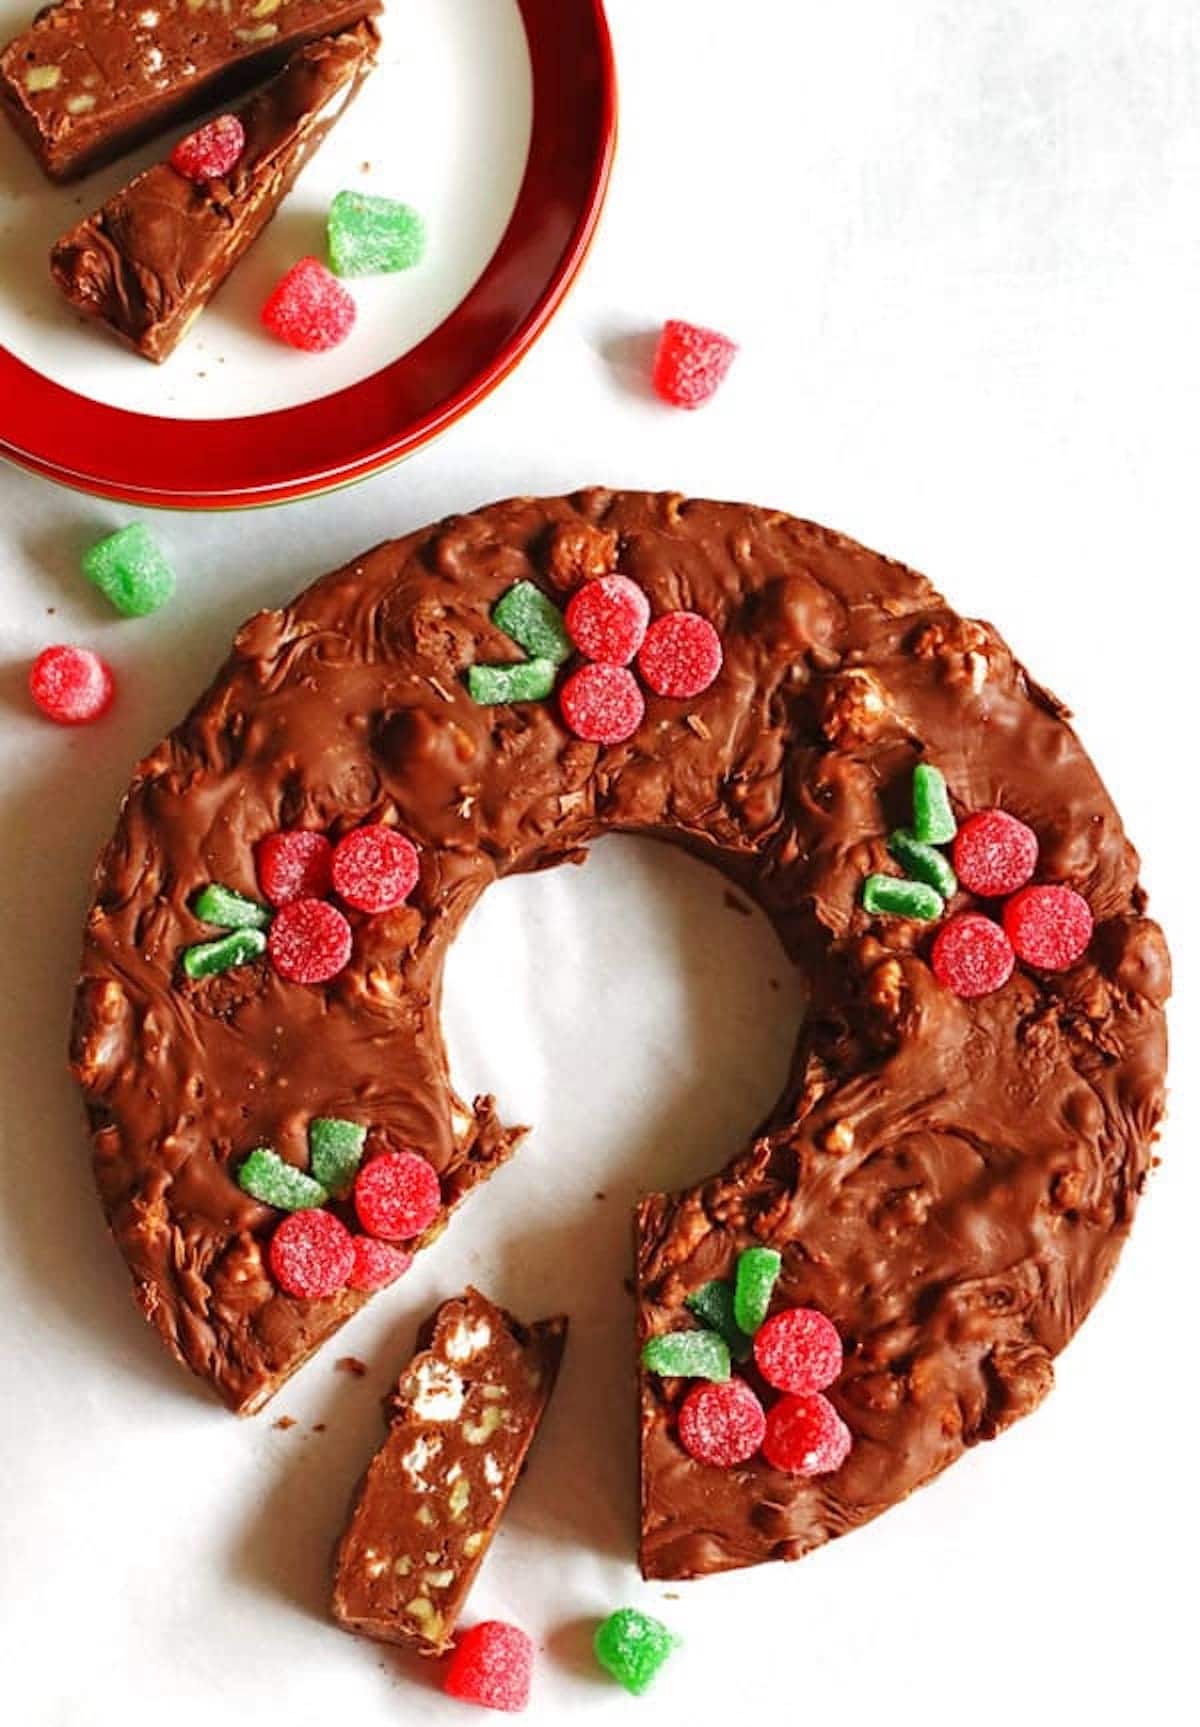
Chill the fudge in the refrigerator for 3-4 hours or until it is set. Once it is set, remove the can. You might have to twist the can slightly to get it out.
If you used foil, the wreath should pop right out. If you used parchment paper on the bottom of the pan only, you might need to run a knife around the edge of the cake pan to loosen it up a little. Then you should be able to lift the fudge wreath right out of the pan.
Wrap up the homemade Christmas fudge in plastic wrap until you are ready to eat it or give it as a gift.
When serving, be sure to slice the pieces small as it is very sweet. You can always go back for seconds!
How to Store Homemade Fudge
Wrap the fudge in plastic wrap tightly – try to prevent air from getting to it – then store the fudge in an airtight container, either at room temperature or in the refrigerator.
It is not necessary to store the fudge in the refrigerator but it will last longer – and it is pretty yummy chilled.
How Long Does this Fudge Recipe Keep?
To make your fudge last as long as possible, keep it in an airtight container as much as you can. We keep our fudge out on a dessert table during holiday events where the fudge is uncovered and it will dry out quickly… so as much as possible – keep it wrapped in plastic wrap AND in stored in an airtight container or plastic bag.
You extend the life even longer by storing it in the refrigerator for 1 to 2 weeks or in the freezer for 2 to 3 months.
Fudge Variations and Substitutions
Peppermint Fudge
A lot of people like to make white chocolate fudge – this recipe doesn’t really work with white chocolate chips. (Okay, it does, but it turns this unfortunate color, which isn’t ideal for a Christmas gift.)
BUT, you could use this white chocolate Christmas fudge recipe to make a red, white, and green wreath. It uses peppermint extract and Christmas sprinkles. You can also top it with crushed candy canes.
Peanut Butter Fudge
You can swap out the butterscotch chips for peanut butter chips to make a chocolate peanut butter fudge. (Or make a peanut butter fudge wreath using this recipe.)
Recipe Tips
- Make sure to line your cake pan before you start. This helps the fudge come out of the pan more easily and also makes for easy clean-up.
- Stir Frequently – When melting the chocolate chips, you do not want to burn the chocolate. Overheating the chocolate chips will make it seize – the chocolate mixture should be smooth and creamy.
- Save the sweetened condensed milk can to make the center of the wreath. Cover it with foil or a plastic sandwich bag and place it in the center of the pan. If it shifts a little while adding in the fudge, just move it back to the center.
- To make it look more like a real wreath, pour the fudge into the pan but don’t smooth off the top. Give it more of a coarse look to resemble a wreath.
- If decorating the wreath with gumdrops, add them immediately after placing the fudge into the pan as the fudge will start to set quickly.
- A bow made from fabric or ribbon can be added to make the wreath look more festive.
Want to Make Chocolate Fudge but not a Wreath?
You can use an 8×8 pan instead of a round cake pan and top it with festive sprinkles. Cut the fudge into small squares for a Christmas cookie tray or gift box.
Looking for More Christmas Cookie Recipes?
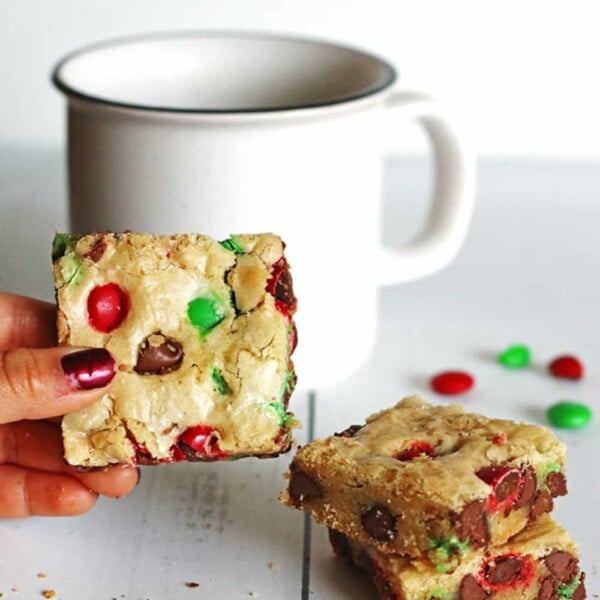
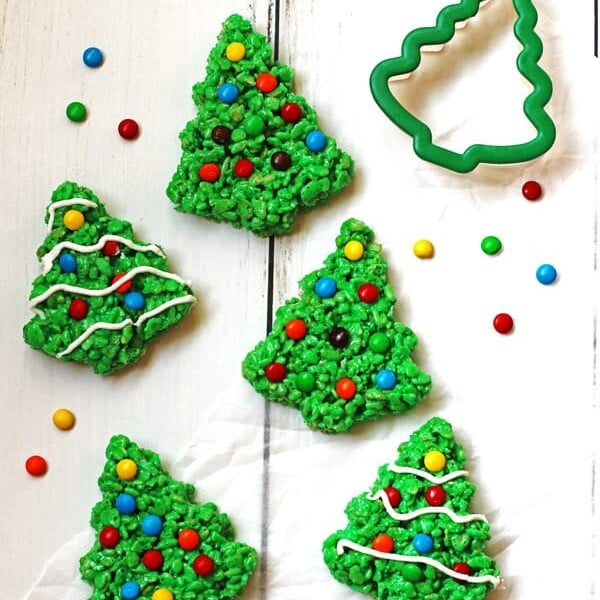
Try my M&M Cookie Bars or Rice Krispie Treat Christmas Trees with red and green M&M’s for a festive look.


Did you make this recipe? If so, please leave a comment and rating below. I love hearing from you.
Easy Christmas Fudge Recipe
Ingredients
- 1 bag (12 ounces) semisweet chocolate chips
- 1 cup butterscotch chips
- 1 can (14 ounces) sweetened condensed milk
- 1 teaspoon vanilla extract
- 8 ounces walnuts chopped
- 2 cups mini marshmallows
- red, white, and green gumdrops
Instructions
- Before starting, line your 9 inch cake pan with foil or parchment paper.
- Place chocolate and butterscotch chips into a medium sized pot with the sweetened condensed milk on the stovetop.1 bag (12 ounces) semisweet chocolate chips, 1 cup butterscotch chips, 1 can (14 ounces) sweetened condensed milk
- On low to medium heat, melt the chocolate and butterscotch chips and combine with the sweetened condensed milk until it is smooth. Stir often.
- Save the empty condensed milk can and cover in foil or a plastic sandwich bag. Place the can in the center of the covered cake pan.
- Stir in the vanilla and remove the pot from the heat.1 teaspoon vanilla extract
- Add in the nuts and marshmallows and stir until mixed in well. If you want whole marshmallows in your fudge, only add half of the marshmallows – stir until smooth, then gently fold in the remaining marshmallows, stirring just until they are added to the chocolate, then pour the fudge into the pan.8 ounces walnuts, 2 cups mini marshmallows
- Pour the fudge mixture into your prepared cake pan around the covered sweetened condensed milk can, keeping the can in the center.
- If adding gumdrops for the berries, add them right away as the fudge will set very quickly.red, white, and green gumdrops
- Chill in the refrigerator for 3-4 hours or until the fudge sets.
- Serve fudge in small slices.
- Store fudge covered either in the refrigerator or at room temperature.
Notes
Tips
- Make sure to line your cake pan before you start. This helps the fudge come out of the pan more easily and also makes for easy clean up.
- When melting the chocolate chips, be sure to use low to medium heat and stir often. Overheating the chocolate chips will make them seize up. The chocolate mixture should be smooth and creamy.
- Save the sweetened condensed milk can to make the center of the wreath. Cover it with foil or a plastic sandwich bag and place it in the center of the pan. If it shifts a little while adding in the fudge, just move it back to the center.
- Make sure the can is facing up so any excess sweetened condensed milk does not drip out into the pan.
- To make it look more like a wreath, place the fudge into the pan without smoothing off the top. Give it more of a coarse look to resemble a wreath.
- If decorating the wreath with gumdrops, add them immediately after placing the fudge into the pan as the fudge will start to set quickly.
- A bow made from fabric or ribbon can be added to make the wreath look more festive.
Nutrition
Nutrition information is approximate and is automatically calculated, so should only be used as a guide.
Update Note: This recipe was originally posted earlier, but was published again in 2020 and again in 2024 to include step-by-step directions and new photos.


Such a cute idea! Hehe I think the hardest part of this is waiting the 3-4 hours for it to set :p
Thanks Kirsten! Yes it is! Haha… :o)
I haven’t made fudge in so long. And it’s usually just plain old chocolate fudge lol. This is fancy!!! Cute idea
It’s so easy to make! ;o) Thanks!
What a brilliant idea for Christmas! I absolutely love fudge!
Thanks Marsha! Me too! :o)
Why is it that we only make fudge at christmas….Im like that too. I like the combination of things you put in yours. Mine is pretty basic…this is a great option for me!
Thanks for checking out the recipe Michele!
Love this idea!! It would be the PERFECT gift too! You can’t go wrong with Fudge except that you could eat all of it in one go! 🙂
Thanks! I agree on eating it all up! HaHa! Does not last long in our house!
That sounds yummy! I’m planning to make it for my holiday party at work this year!
Thanks Zoey! I hope it is a hit at your party! Happy Holidays!
Jeannie
I never thought making fudge was so easy. It reminds me of those fudge shops at the amusement parks. That and salt water taffy. Thanks for sharing.
HI Melanie,
It is so easy, isn’t it? Happy to hear you liked the recipe!
Jeannie